A long-awaited update of Ignis Pixel Utility 2 has been done. This is just a small part of the big update that is still ahead. Anyway, we are looking forward to sharing the good news and telling about the changes.
The version 2.1.16 has the following changes:
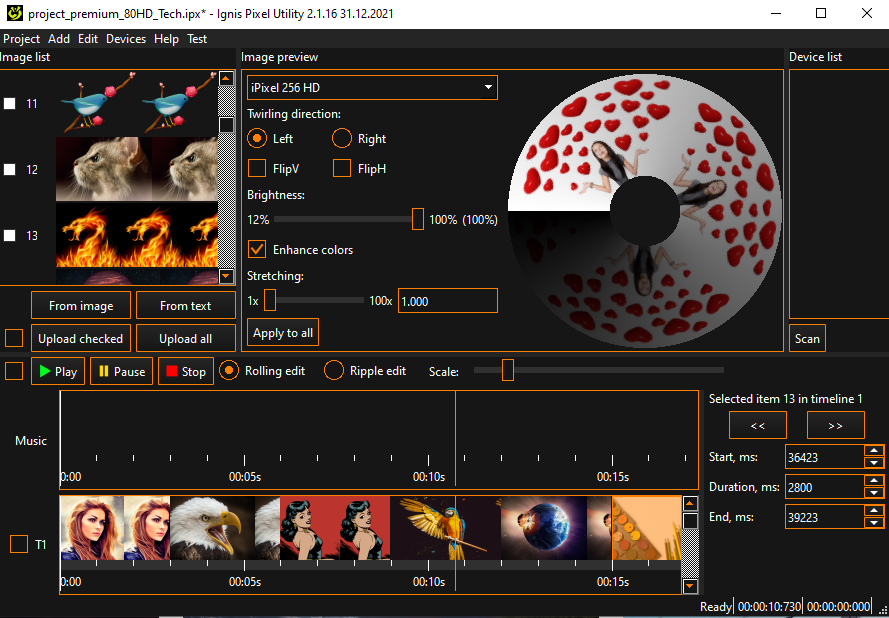
1. A panel to edit duration of pictures in the timeline. Before the update, you could only change the duration by dragging the edge of a picture, thus expanding or narrowing it. Now you can do it by changing required digits. Click a picture you want to edit duration of, and set the required timing in the “Duration” section. Or set a mouse into “Duration”, “Start” or “End” section and scroll the mouse wheel up or down. You will see the timing changing by 10 milliseconds per one notch of the mouse wheel. If you press CTRL and scroll the mouse wheel again, the timing will change 10 times faster. You can navigate from picture to picture by using left/right buttons.
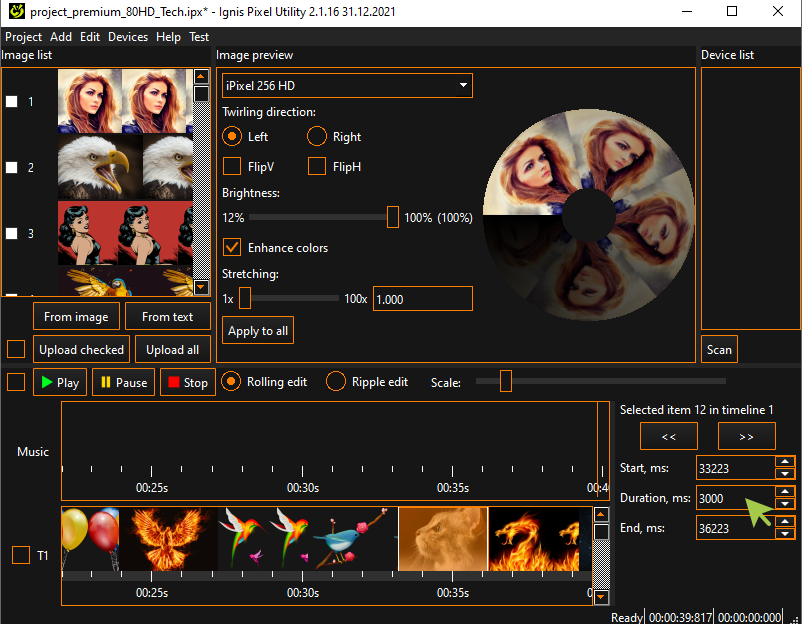
Pay attention at “Rolling edit” and “Ripple edit” modes just above the music scale. When you change the duration of a picture in a timeline being in “Rolling edit”, you do it at the expense of the subsequent picture, the timing of the whole timeline doesn’t change. Now switch the mode to “Ripple edit” and do the same – you will see that changing the duration of the current picture you change the timing of subsequent pictures of the timeline, the timing of the entire timeline also changes.
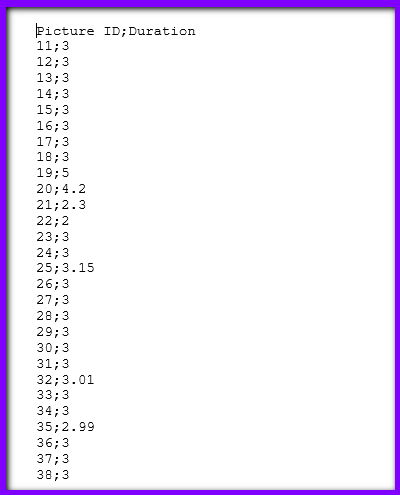
2. Export and import of an entire timeline into a separate file. Thus, by exporting and importing you can transfer the timeline from one project to the other, or copy the project. Click the right mouse button on some picture in the required timeline and choose “Import” or “Export” in the context menu.
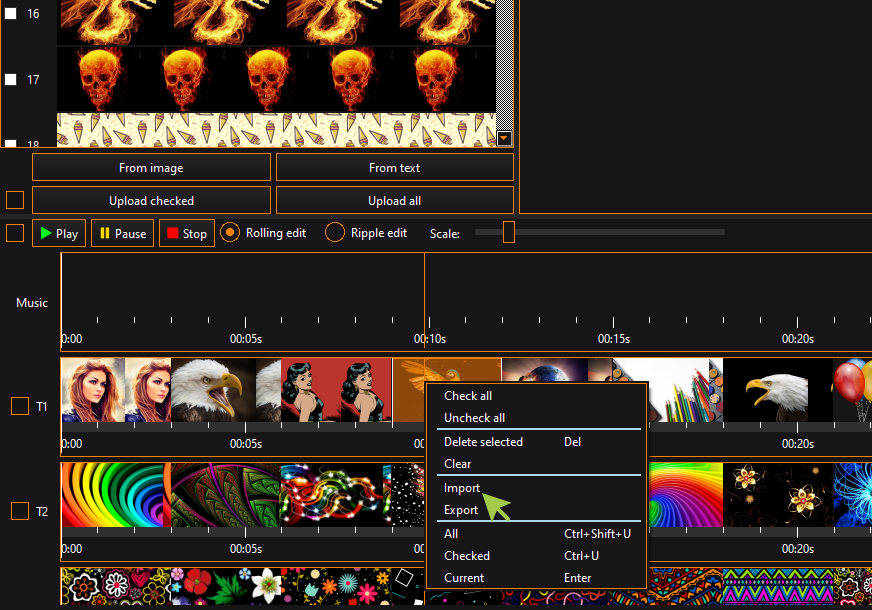
The generated file has .csv format and can be read by a text editor like Microsoft Word, WordPad, Excel (or analogues). It shows the number of a slot the picture was taken from, and its duration in the timeline. By the way, you can change the digits right in the text editor and save the file. Note that the number of slots shows +10. It means that the file will show slot #1 as #11, #2 as #12, etc.
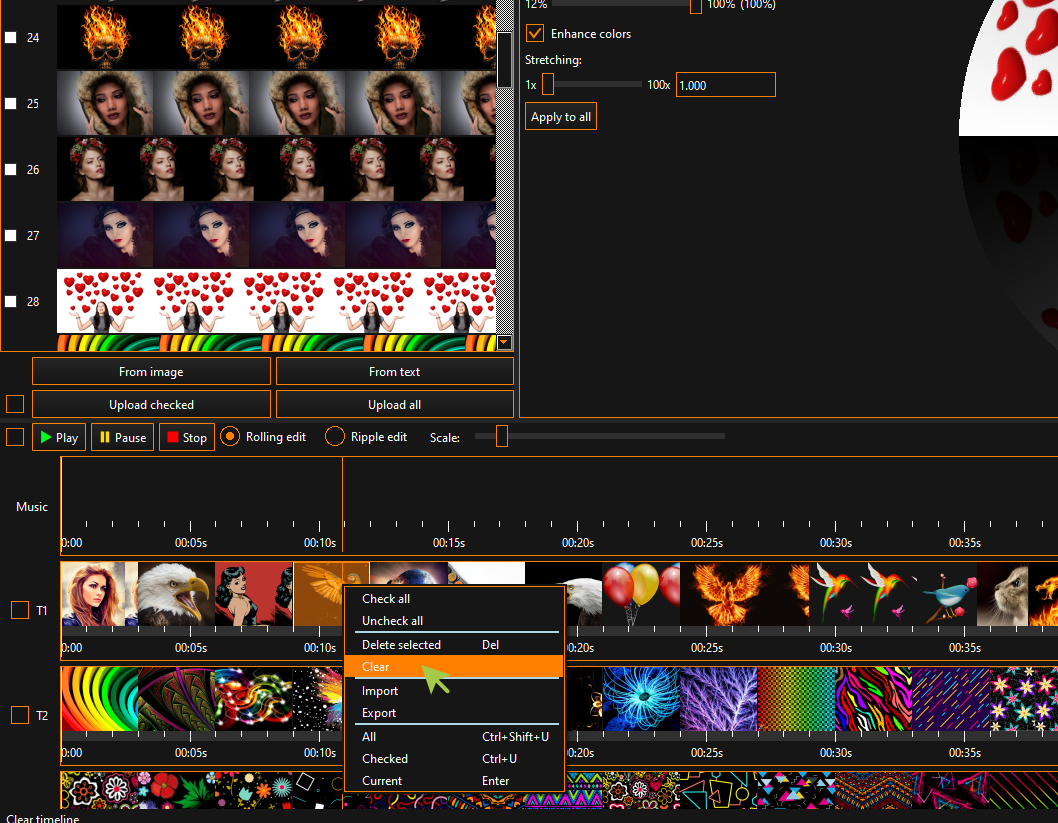
3. “Clear” function in the context menu. Set the mouse to any picture in the required timeline, click the right mouse button and select “Clear”. All pictures from the timeline will be deleted.
We hope it will help you to work with timelines and make the software more user-friendly. Stay tuned for other updates.